❏ What is Lychee Time Management?
Lychee Time Management allows you to drag-and-drop issues and work categories on a calendar to input man-hours.
This means that task owners in the workplace have greatly reduced burdens when it comes to entering man-hours.
Facilitating the input of workplace man-hours helps to accumulate accurate data, which managers can analyze and use toward improving operations.
❏ Main Functions
1. Drag-and-drop Man-hour Input
You can log your work plans in the calendar from tomorrow onward or record your actual work done today on a previous day. A different background color is set automatically for each project.
(1): Register issues by drag and drop.
(2): Register work contents for issues by drag and drop.
2. Managing Members’ Schedules
You can check the planned work and actual work done by members participating in a project.※ You cannot create or edit a member’s planned work or work accomplished.
※ The planned work and project-unrelated work plans/activities from other projects are not displayed.
❏ Getting Started
The following settings are necessary for using Lychee Time Management.
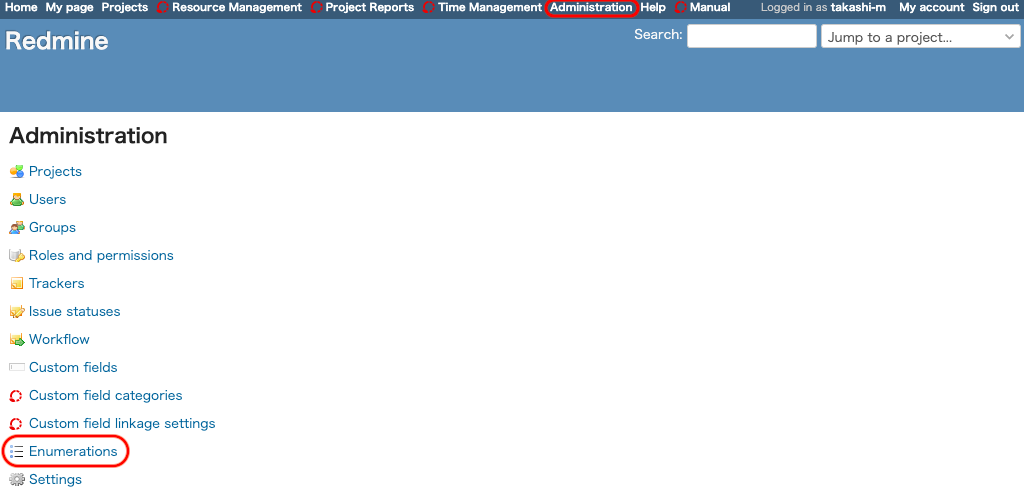
1. Setting Permissions
In order to be able to use Lychee Time Management, you must first select the appropriate permissions under Administration > Roles and permissions.
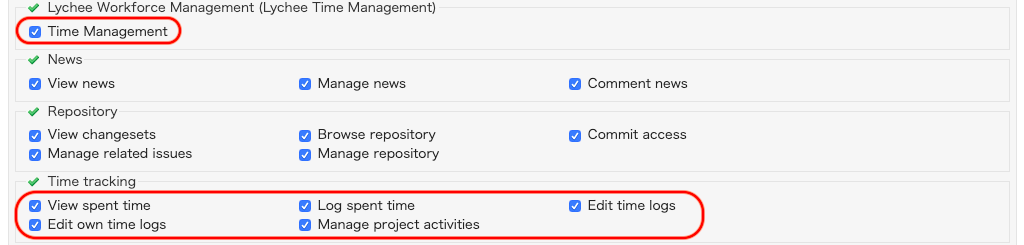
Lychee Workforce Management (Lychee Time Management)
| Item | Description |
|---|---|
| Time Management | Needed to display Calendar |
Time tracking
| Item | Description |
|---|---|
| View spent time | Needed to display planned and worked hours |
| Log spent time | Needed to create planned and worked hours |
| Edit time logs | Needed to edit planned and worked hours |
| Edit own time logs | Needed to edit planned and worked hours |
| Manage project activities | Needed to set project activities for a project |
※You can edit planned and worked hours as long as you have either the “Edit time logs” permission or the “Edit own time logs” permission.
2. Setting Work Activities
Only a system administrator is able to create activities.
< Creating a Project activities >
“Project activities”is the same as the standard “Project activities” function in Redmine and is used to record spent times for a project.
“Project activities”can be created by going to Administration > Enumerations.
1. Administration > Enumerations
2. Activities (time tracking)

Clicking”New value”at the bottom left of the screen will take you to the following screen.

You can create the new value by entering its name.
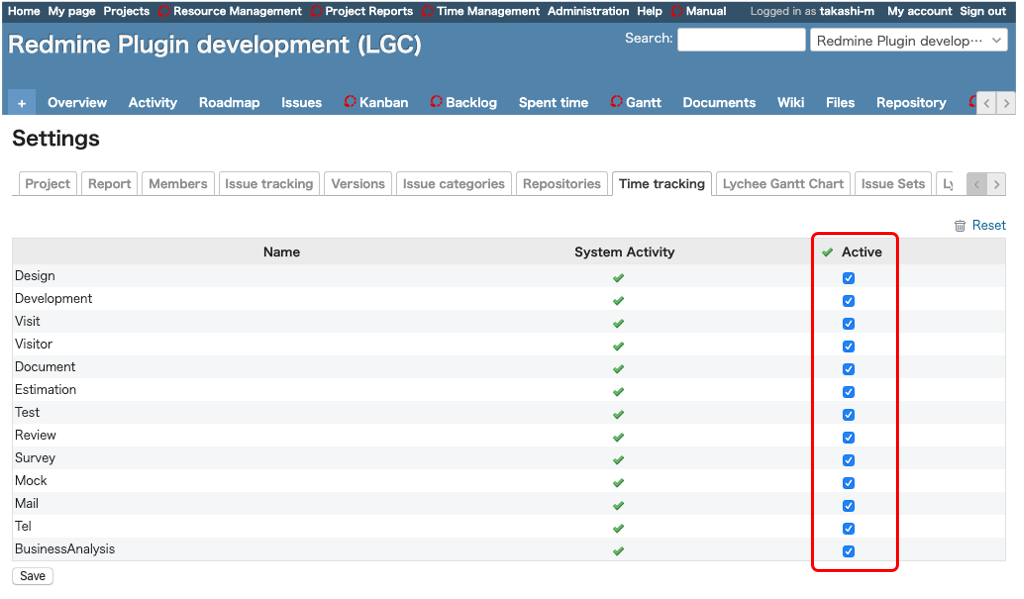
Also, you can select whether theProject Activitiesyou created is active or inactive for each project.
・Setting Active/Inactive Status
You can set the Active/Inactive status by going to Projects > Settings > Time tracking and clicking the checkbox at the right edge of the screen.
< Creating a Project-unrelated activities >
An “Project-unrelated Activities” is a category for recording work which is not directly linked to a project.
You can create an “Project-unrelated Activities” by going to Administration > Enumerations.
1. Administration > Enumerations

2. Project-unrelated activities (time tracking)

Clicking “New value” at the bottom left of the screen will take you to the following screen.
You can create the new value by entering its name.

< Start time for auto-schedule tasks >
You can set the start time for auto-schedule tasks.
The settings can be found under Administration > Plugins > Lychee Time Management.

❏ My Calendar Screen
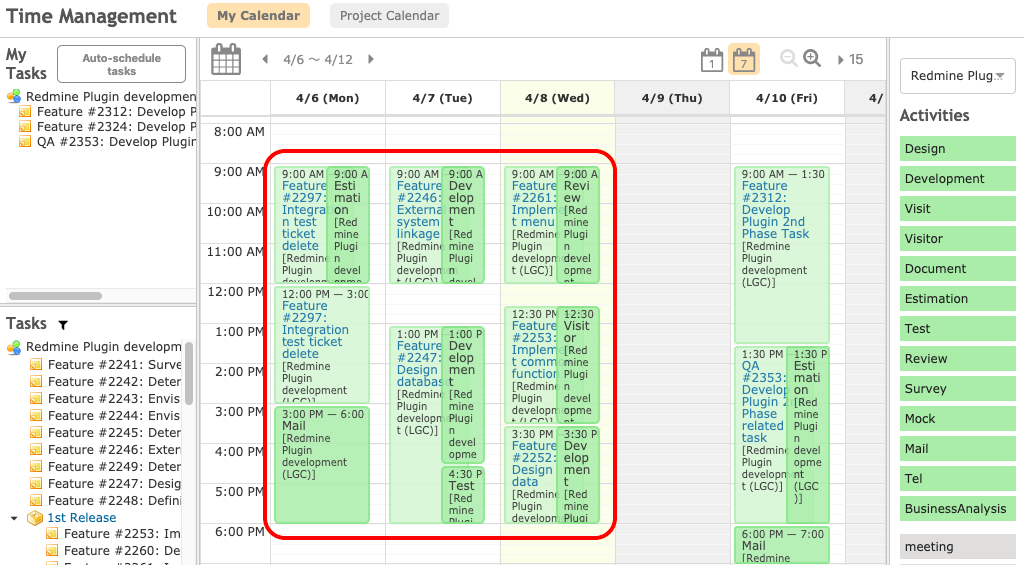
The My Calendar screen displays, from left to right, a list of issues, a weekly calendar, and a list of activities.
Planned work is logged from the current date onward, while actual work is recorded for past dates.
Planned work is converted to actual work done after its date passes.
You can also edit actual work for past dates.
Actual work is displayed with a thick border.
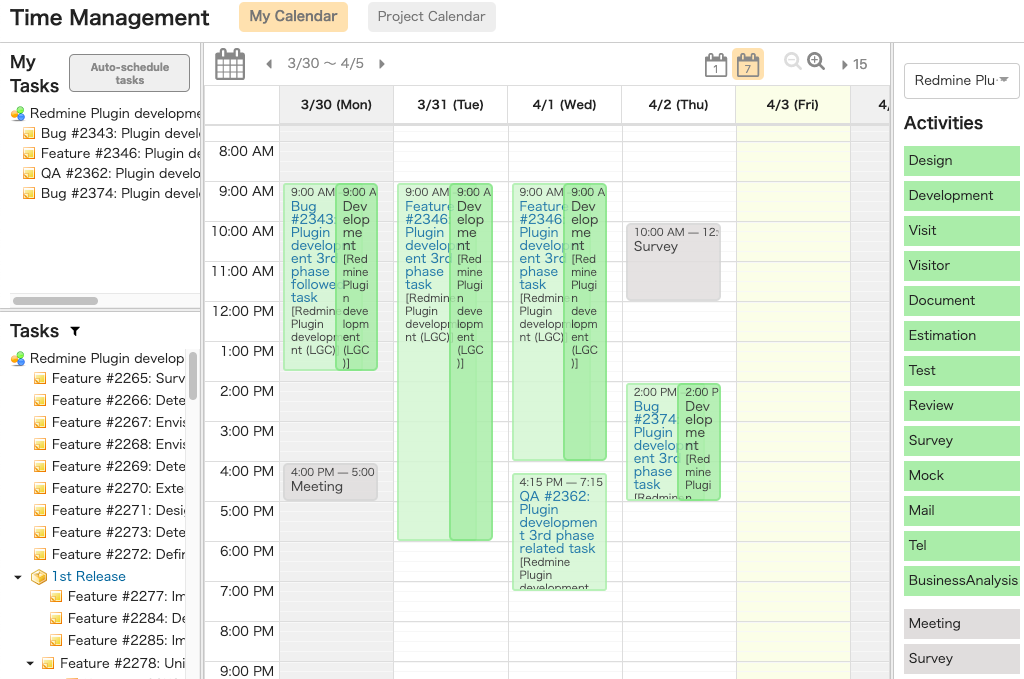
- You can place three types of items in the calendar:”Issue” “Project activities”, and “Project-unrelated activities”.
- Any spent times recorded using Redmine’s standard functions will not appear in Time Management.
- Issue:Selecting a project in the left pane allows you to drag-and-drop an issue to place it in the calendar.
- Project activities:The blue panels listed in the right pane are project activities.
You can drag-and-drop them to place them in the calendar.
“Project activities” is the same as the standard Redmine function “Activities”.
You can set the “Project activities” for each project. Only a system administrator can create new activities.
You must have the “Manage project activities” permission to set activities for each project. - Project-unrelated activities: The gray panels listed in the right pane are project-unrelated activities.
You can drag-and-drop them to place them in the calendar.
“Project-unrelated activities” can be edited under Administration > Enumerations.
“Project-unrelated activities” are shared across all projects.
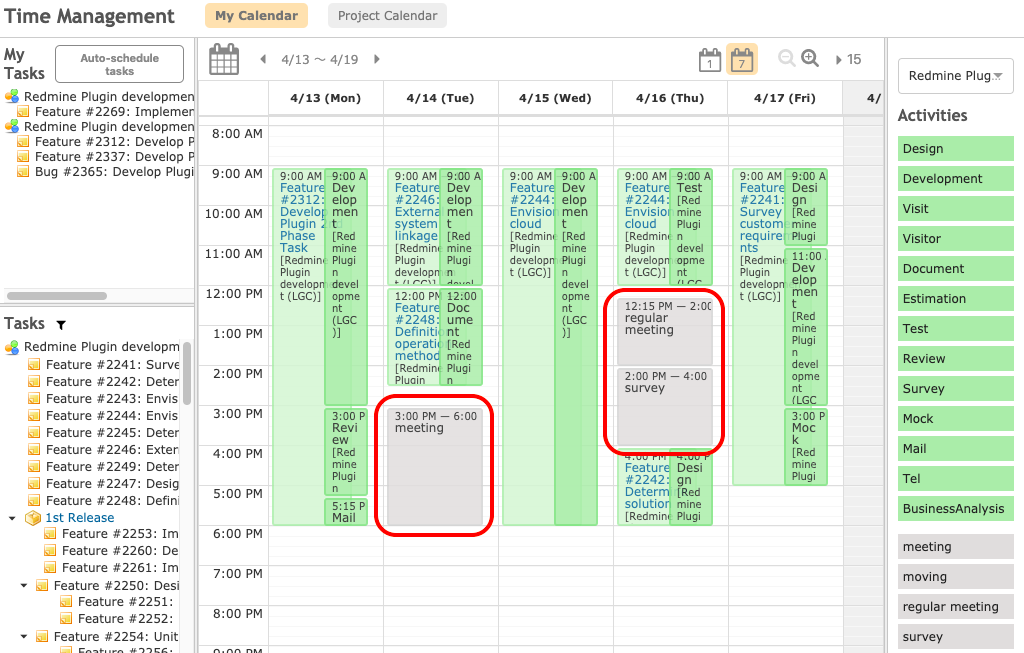
Only a system administrator can create new activities. - “Project-unrelated activities” cannot be placed on top of “Issues”.
❏ Selecting Projects
When you change projects, the “Issues” list and “Project activities” list will also change.
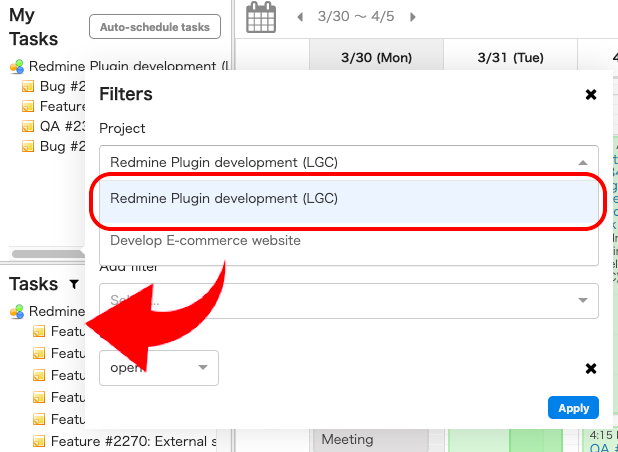
The “My Tasks” pane at the top left of the screen displays your issues with a period (start date – due date) which is wholly or partially included in the displayed calendar period. The “Tasks” pane in the bottom left shows by default the issue list for the last displayed project. You can select another project for display.
- Click the filter icon to the right of “Tasks”
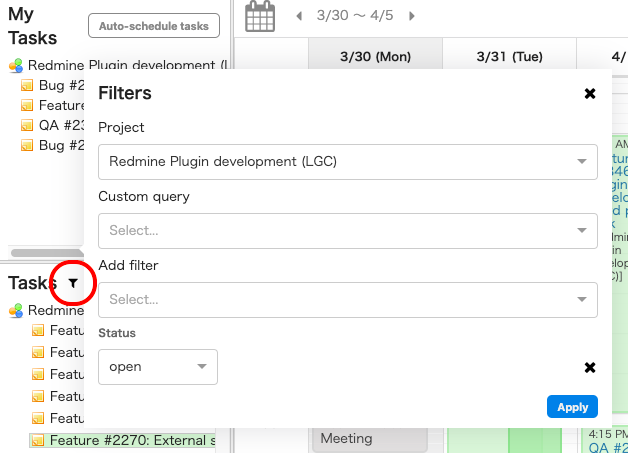
- Click any project from the displayed list of projects.
❏ Placing Issues
After placing an “Issue”, you can drag its edges freely to set its man-hours.
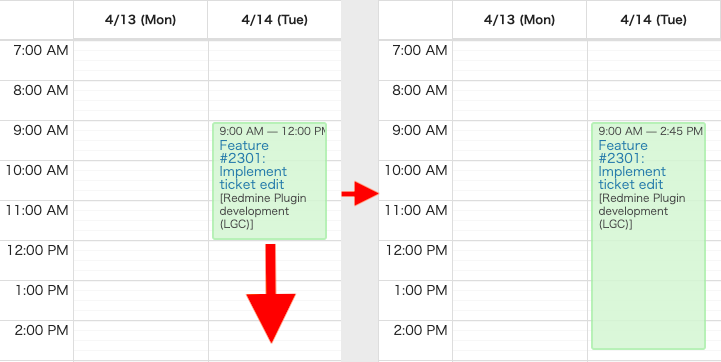
- Drag-and-Drop:
You can drag-and-drop an “Issue” to place it.
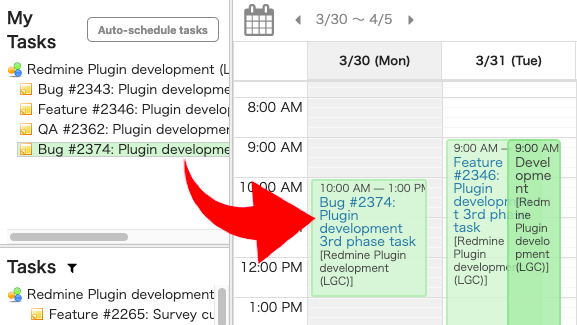
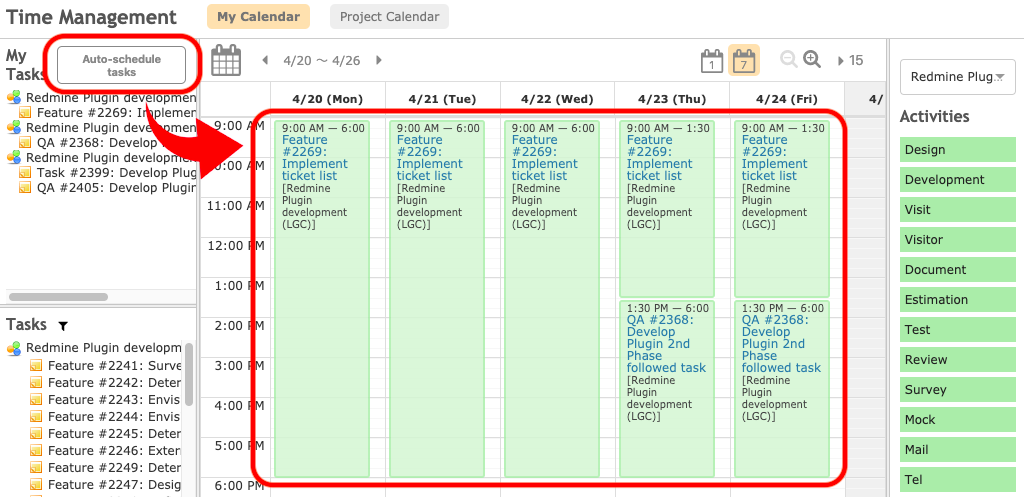
- Automatic Placement of Planned Work:
You can automatically place any issues which have planned work during the displayed calendar period.
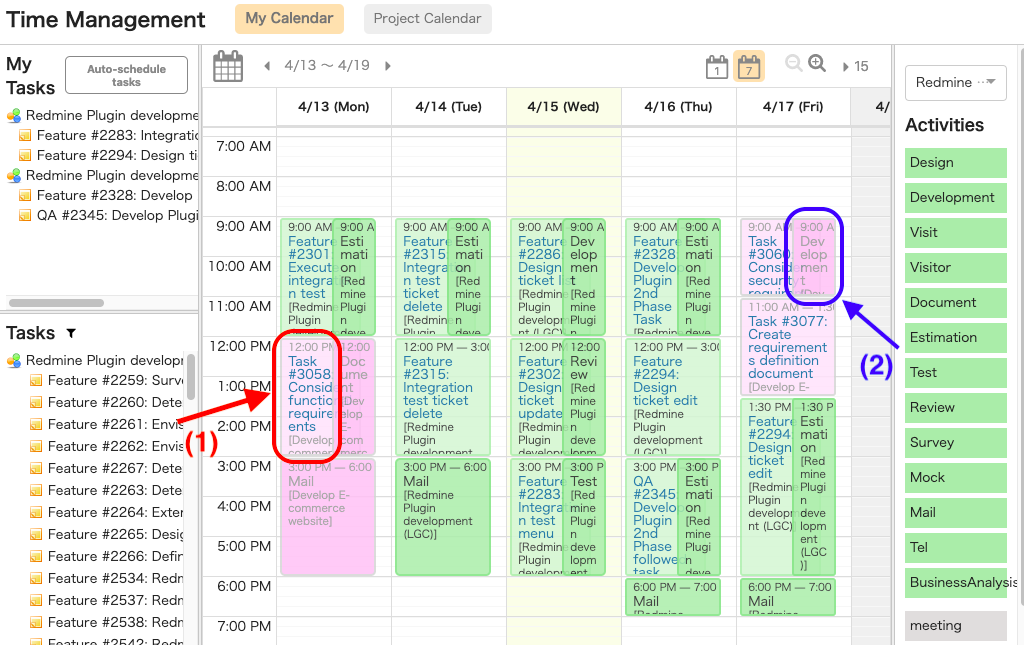
❏ Placing Project activities
You can drag-and-drop “Project activities” to place them in the calendar.
You can also drag-and-drop a “Project activities” onto an “Issue” in order to link them.
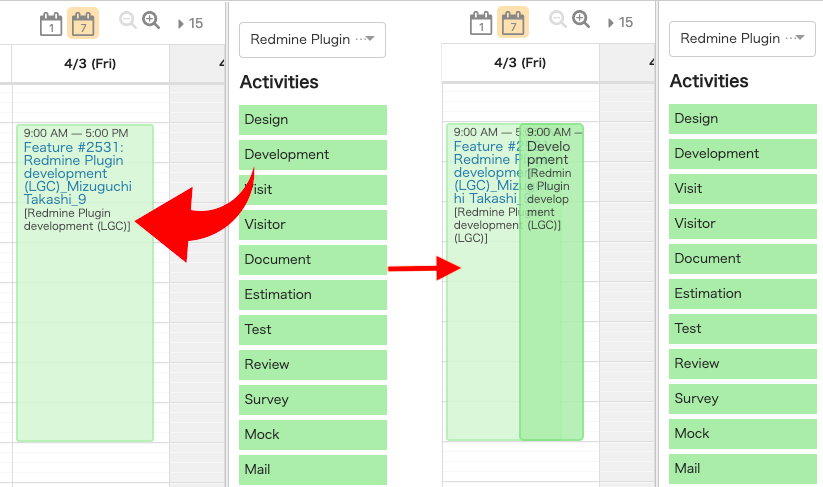
You can assign several “Project activities” to a single “Issue”.
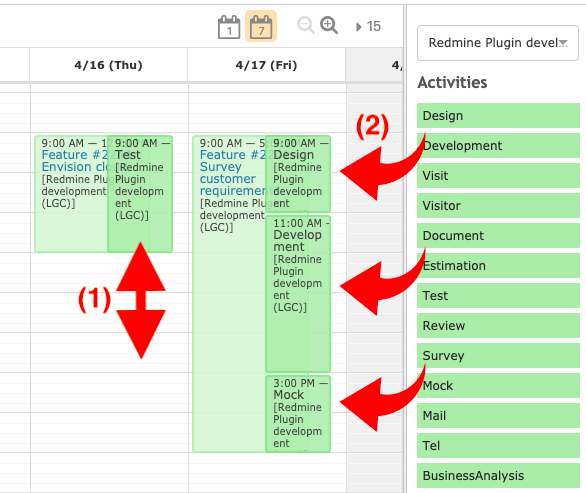
(1)… Drag the edges freely to set the project activity for the issue.
(2)… You can assign several project activities to a single issue.
Past “Project activities” are recorded in Redmine as spent times.
Standalone “Issues” which have no project activities associated with them are not recorded as spent times.
❏ Placing Project-unrelated activities
The placement method is the same as for “Project activities”.
“Project-unrelated activities” cannot be placed onto issues because they are not associated with any project.
❏ Changing the Display Week
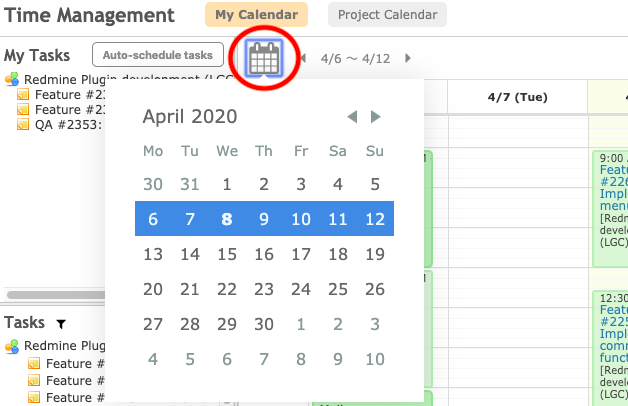
Clicking the calendar icon will display a calendar, from which you can select any week you would like to display.
❏ Changing the Calendar Time Units
Clicking on the numbers to the right of the Daily and Weekly calendar icons allows you to cycle through different time units for the calendar display (15, 30, 60 minute units).

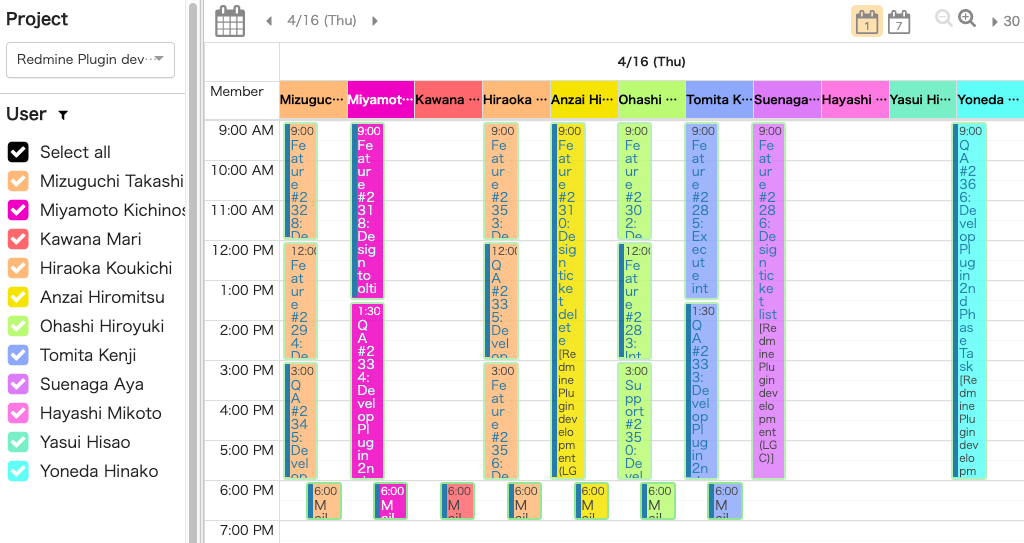
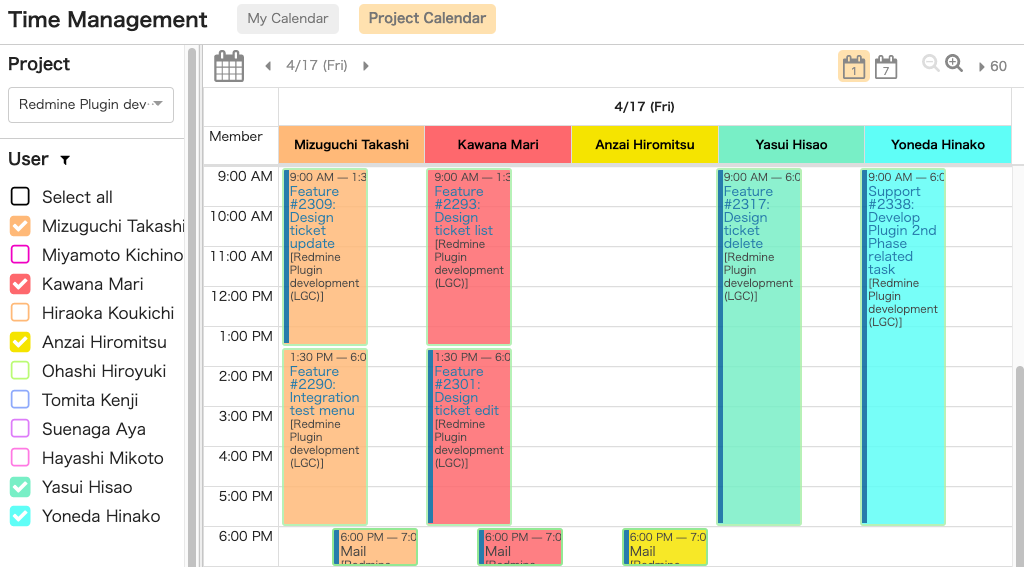
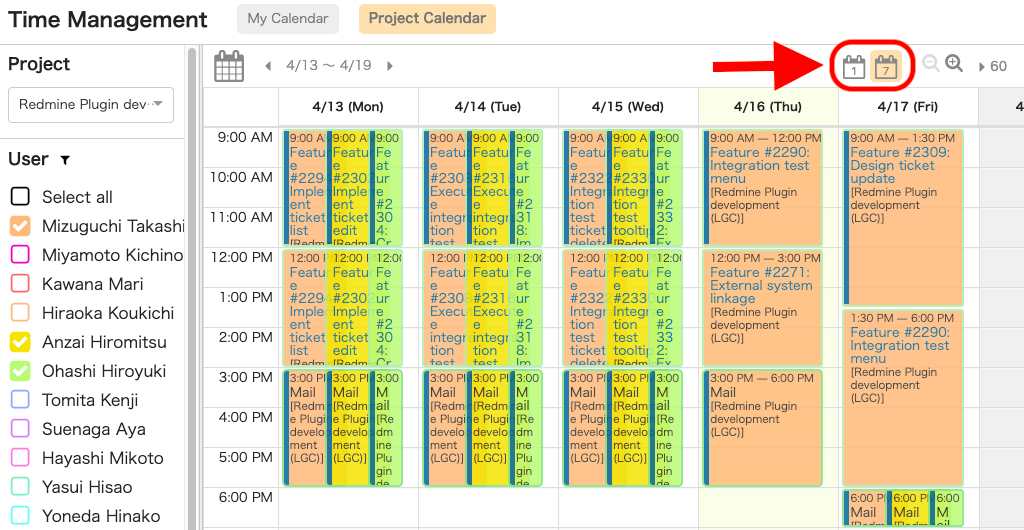
❏ Project Calendar Screen
Here you can check the planned and actual work done by members of the selected project.
You cannot add or edit any planned or actual work.
You can only view the planned or actual work related to the selected project.
The planned and actual work, as well as any “Project-unrelated activities”, for other projects will not be displayed.
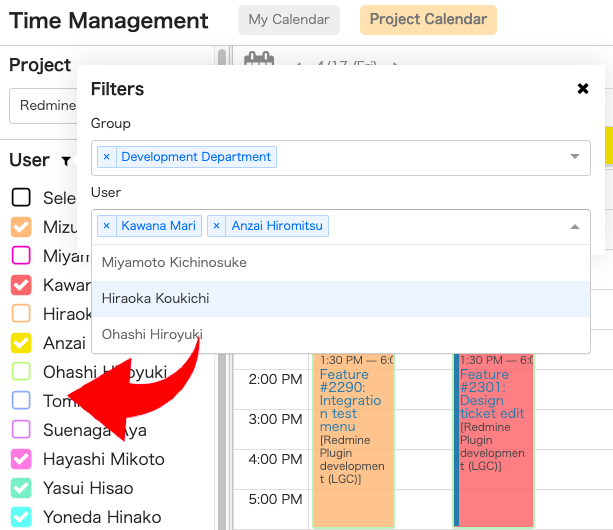
❏ Member Search
You can search for the members you want to display.
- Click the filter icon to the right of “User”.
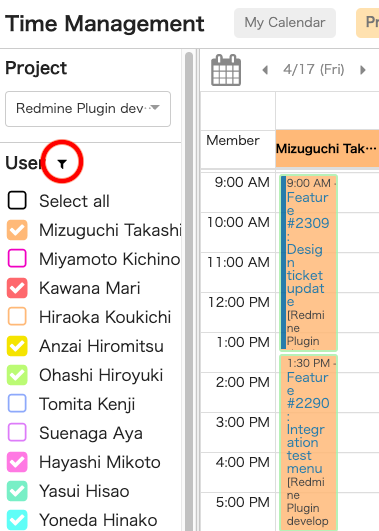
- Choose any groups and users from the list and click to select them.
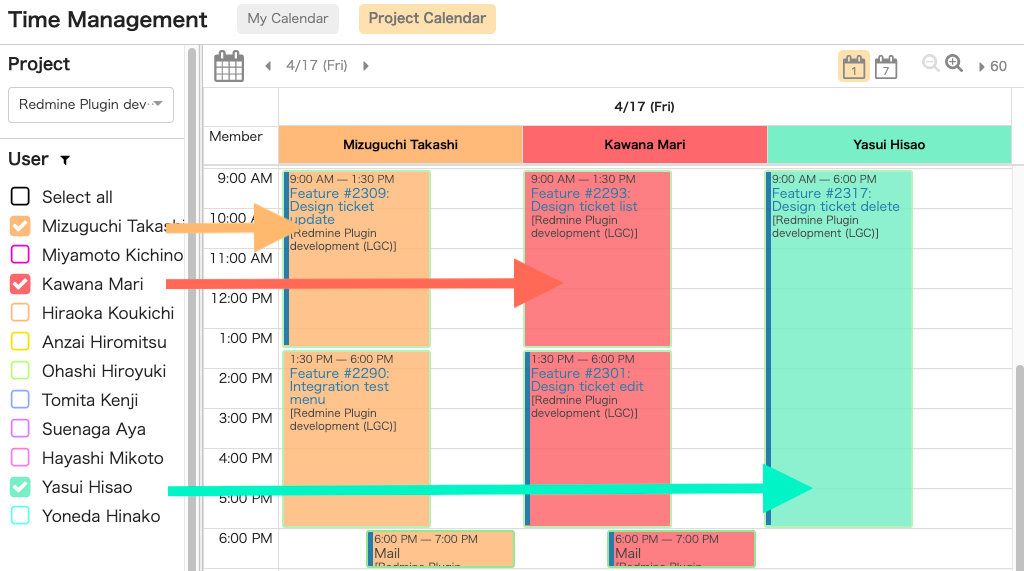
❏ Changing Displayed Members
You can change the members whose planned and actual work is displayed by using the checkboxes next to their names.
❏ Daily and Weekly Displays
You can switch between the Daily and Weekly displays by clicking the respective buttons at the top right of the screen.
The calendar operates the same as the Daily display when used for the previous or following week.
コメント