❏ What is Lychee Time Management Google Calendar add-on?
Google Calendar add-on allows you to select work plans in Time Management and connect them to Google Calendar.
To use Google Calendar add-on, you must perform the following steps:
- Obtain an API key from Google Cloud Platform
- Perform Redmine settings
- Perform settings for each user
*Please be aware that any changes made on Google Calendar will not be reflected in Lychee Time Management.
*You must have the Lychee Time Management plugin installed.
❏ Obtaining an API Key from Google Cloud Platform
In order to link with Google Calendar, you must first obtain an API key from Google Cloud Platform. An API key is like a password which allows Time Management to access Google Calendar. Once a representative has obtained an API key, other users can use that API key to link their work plans with Google Calendar.
Each user does not need to obtain their own API key.
- Login to your Google account.
- Access the “APIs & Services” dashboard.
https://console.cloud.google.com/apis/dashboard - Click “Select a project▼” to create a project.

- Click “NEW PROJECT”.

- Enter a project name and click the “CREATE” button.
After a moment, the information for the new project will be displayed.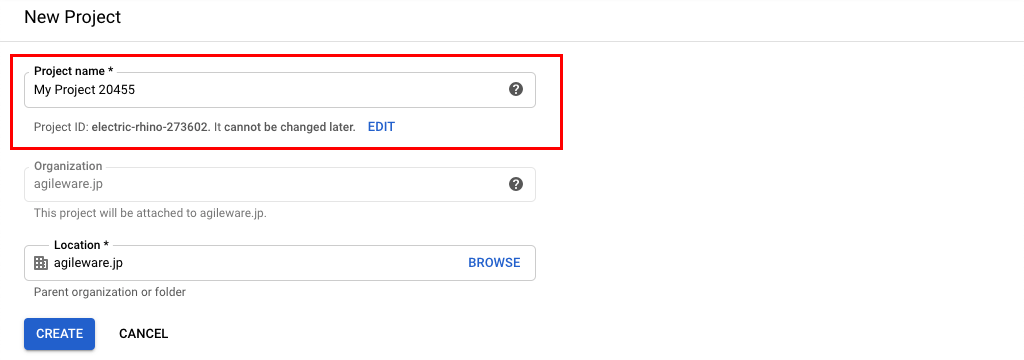
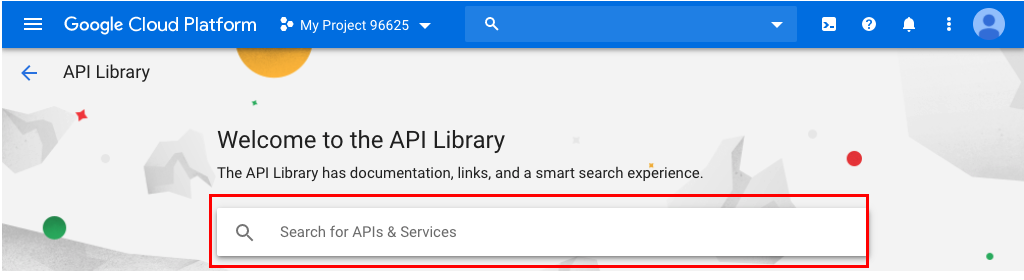
- Click “ENABLE APIS AND SERVICES”.

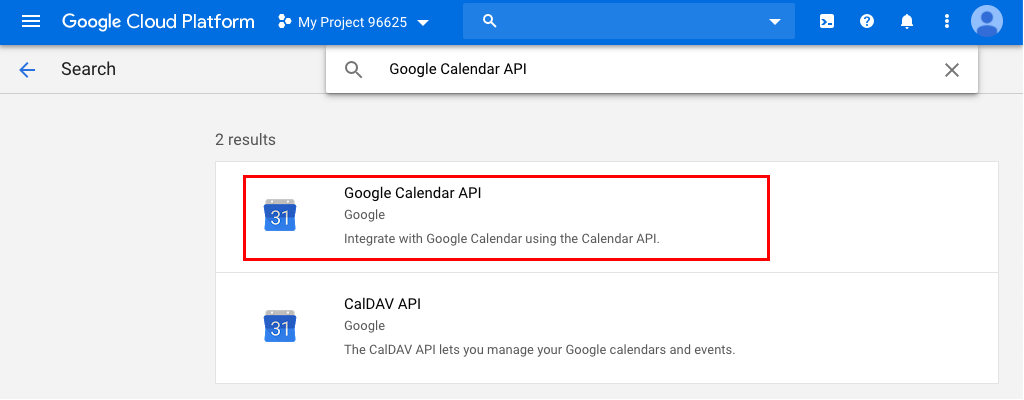
- In the “Search for APIs & Services” field, run a search for “Google Calendar API”.
- Click on “Google Calendar API” in the search results.
- Click “ENABLE”.

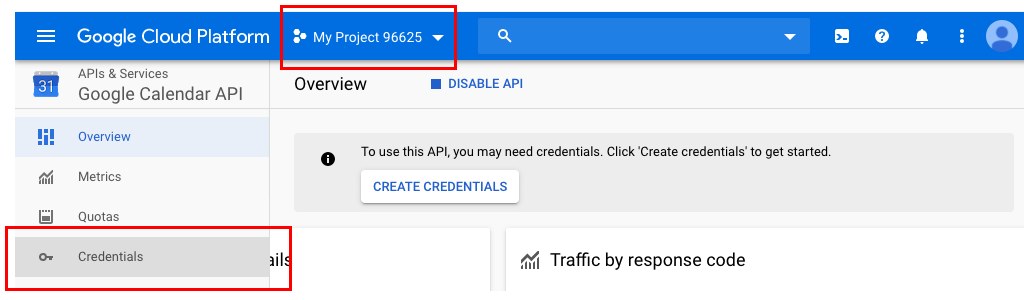
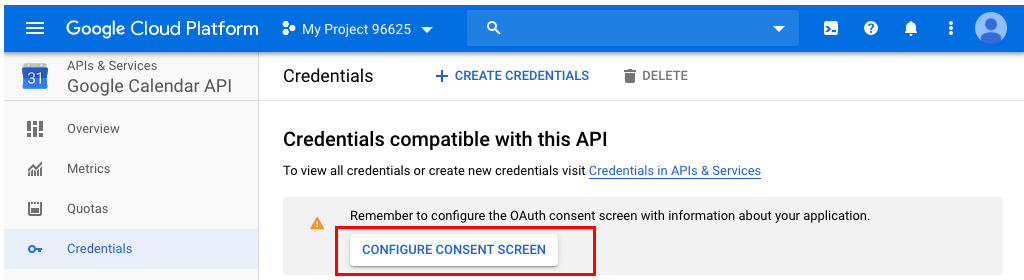
- Ensure that the project you created is selected, then click “Credentials”.
- Click “CONFIGURE CONSENT SCREEN”.
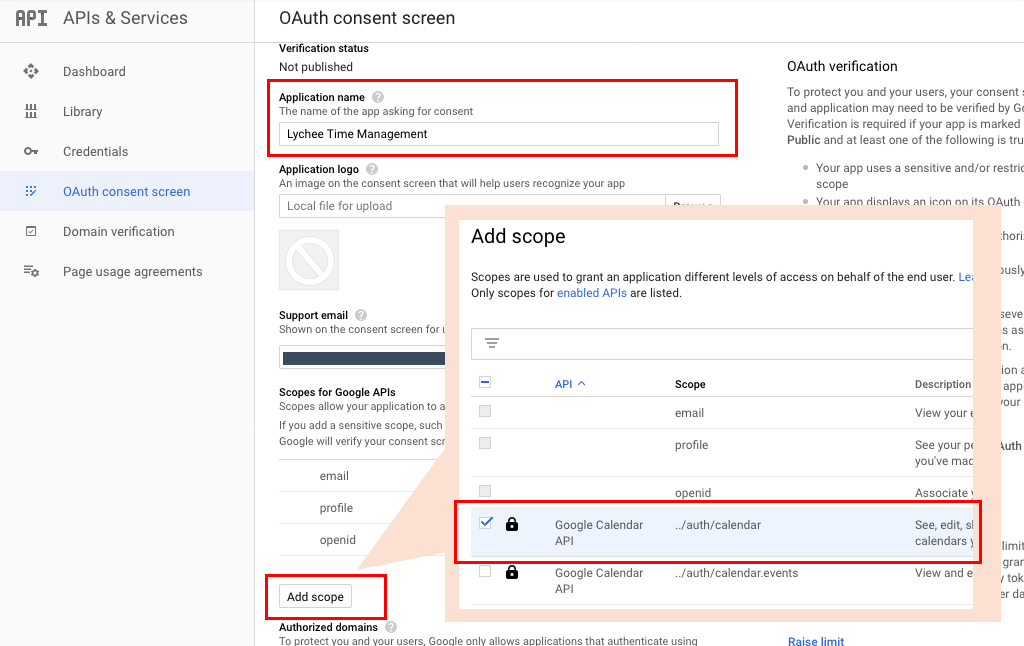
- Set up the OAuth consent screen by entering the following information, then click “Save”.FieldInputUser TypeIf only members of G Suite will be using Google Calendar Link, select “Internal” — Otherwise, select “External”Application NameInput any name you like, such as
Lychee Time ManagementScopes for Google APIsClick “Add scope”, check the box for the row with../auth/calendar, then click “Add”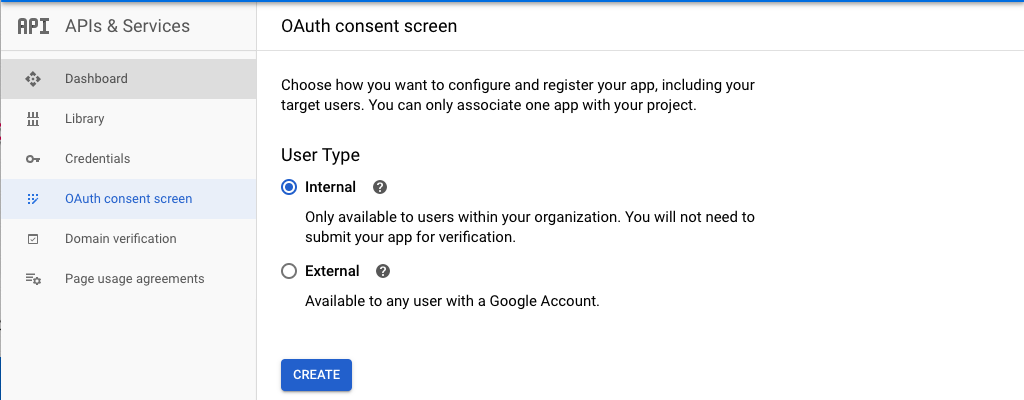
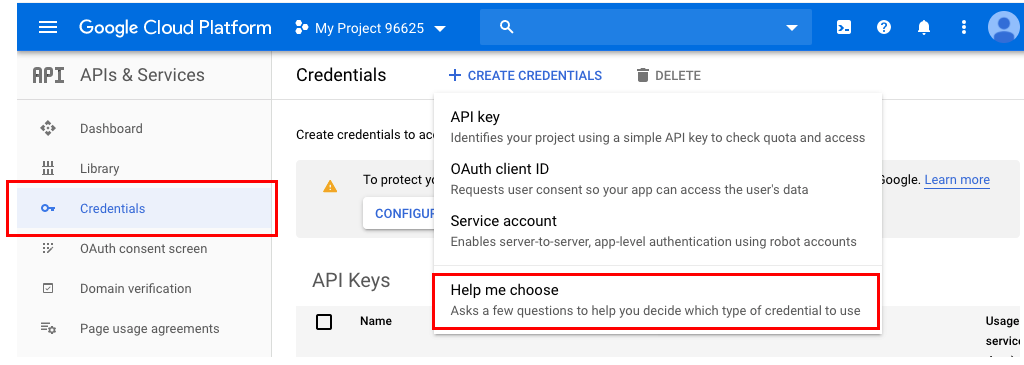
- Click “CREATE CREDENTIALS” and select “Help me choose”.
- Find out what kind of credentials you need.
Enter the following information and click “What credentials do I need?”FieldValueWhich API are you using?Google Calendar APIWhere will you be calling the API from?Web server (e.g. node.js, Tomcat)What data will you be accessing?User data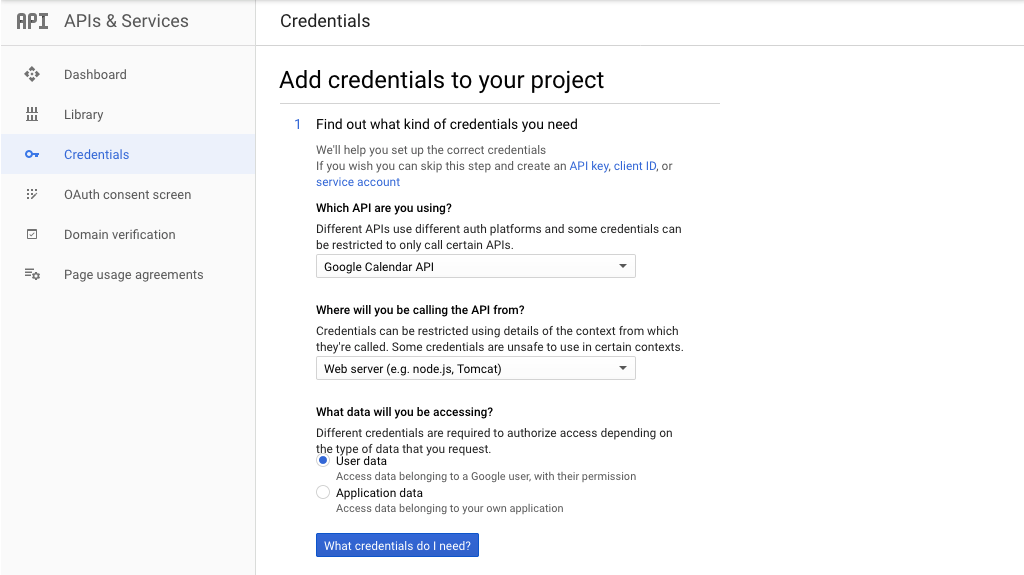
- Create an OAuth 2.0 client ID.
Enter the following information and click the “Create OAuth client ID”.FieldValueNameAny nameAuthorized JavaScript originsEmpty (default)Authorized redirect URIsInput the following:
{Redmine’s URL}/ltm_google_calendar_syncs/callbackExample:
If Redmine’s URL is “https://demo.lychee-redmine.jp”
https://demo.lychee-redmine.jp/ltm_google_calendar_syncs/callback
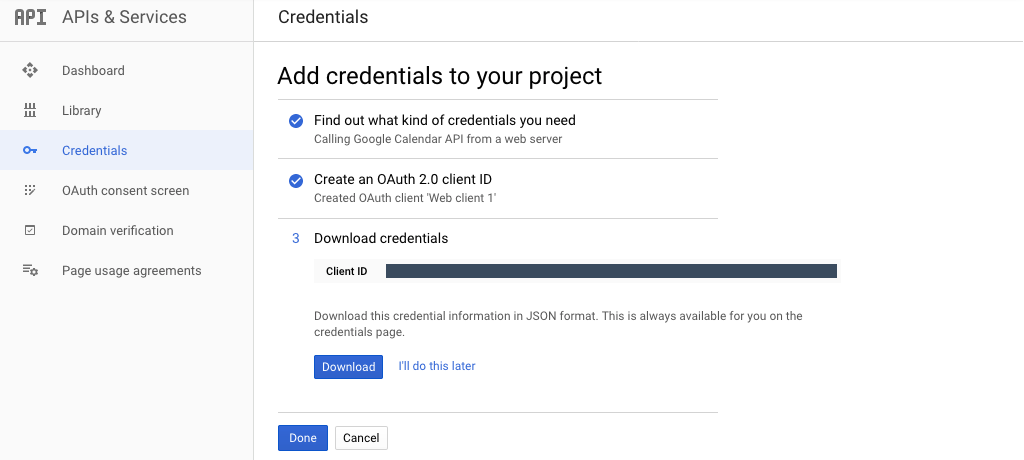
- Download credentials. Once the “Client ID” is displayed, click “Done”.
- Display the client ID editing screen by clicking the
 icon.
icon.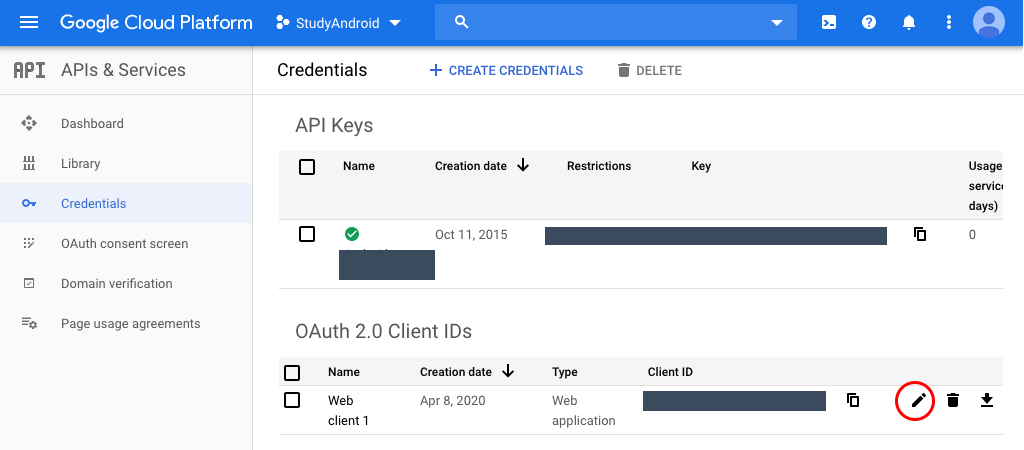
- Save the Client ID and Client Secret.
You will need the Client ID and Client Secret on the Redmine Google Calendar Link screen, so copy them or write them down somewhere.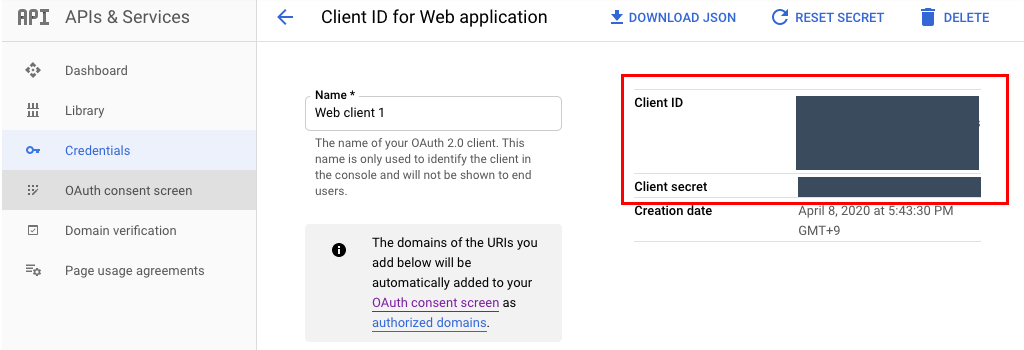
❏ Redmine Settings
The information obtained in the “Obtain an API Key from Google Cloud Platform” section is required for the Redmine settings.
- Log in to Redmine using an account with system administrator permissions.
- Open the “Lychee Time Management Google Calendar add-on” configure screen.Go to Administration > Settings > Plugins > Lychee Time Management Google Calendar add-on and click on “Configure”.
- Setup Lychee Time Management Google Calendar add-on.Input the information below and click the “Apply” button.FieldValueActivateONClient IDClient ID from “Obtain an API Key from Google Cloud Platform” sectionClient secretClient Secret from “Obtain an API Key from Google Cloud Platform” section

You must set up each user’s Redmine account to link Lychee Time Management with their individual Google Calendar account.
❏ User Settings
You must link each user’s Redmine account with their Google Account.
- Open the “My account” screen.
- Click “Connect” next to “Google account connected to Lychee Time Management”.
Google’s “Account Selection” screen will be displayed.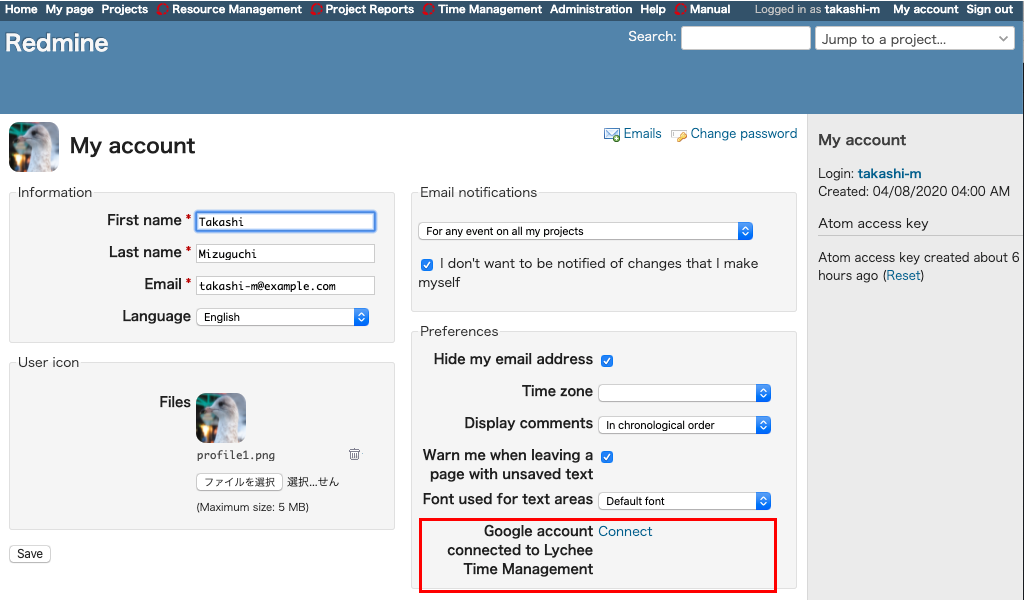
- Select the account you want to connect.
- Give permission to access the Google account by clicking the “Allow” button.
- Select the calendar to synchronize with.
You will be returned to the “My account” screen. Select a calendar under “Google calendar connected with Lychee Time Management” and save.
コメント