❏ What is Lychee Issue Set?
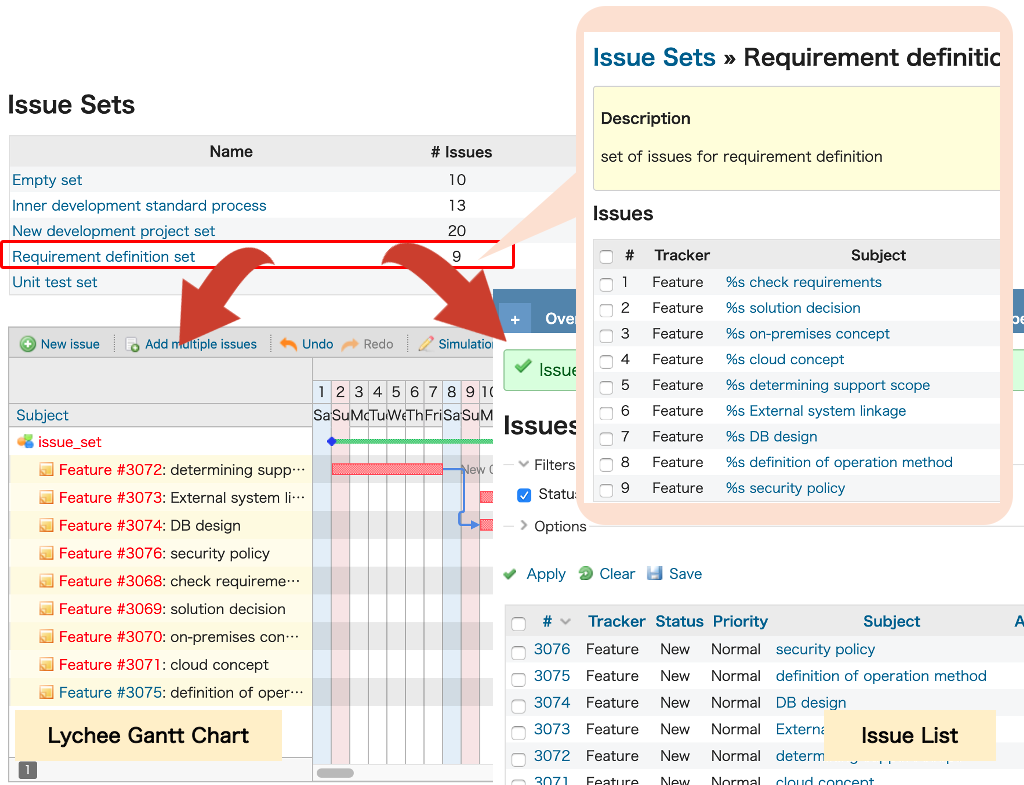
Lychee Issue Set is a plugin which allows you to make templates of several issues with their parent-child and sequential relationships and name those templates.
By preparing templates in advance, you can easily generate several issues at once.
❏ Setting Permissions
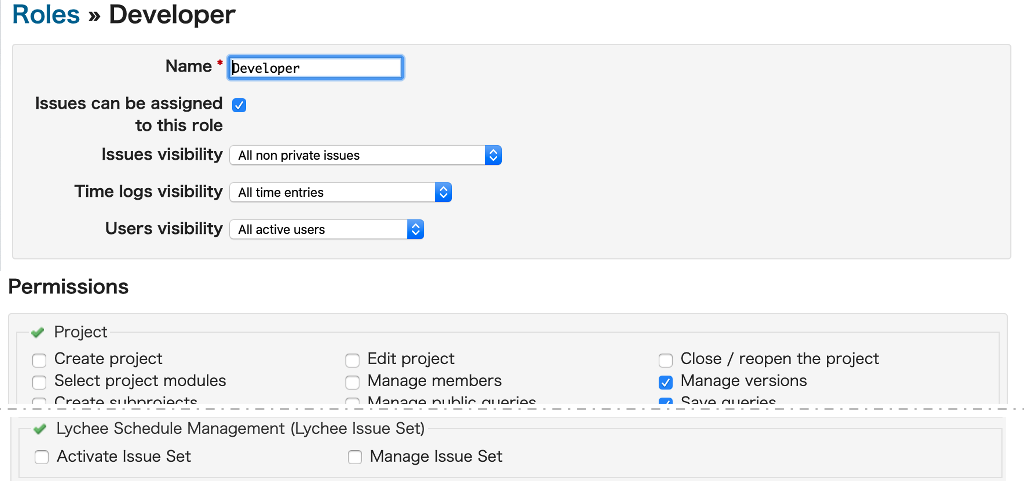
To create issue sets using Lychee Issue Set, you must be a system administrator or have the “Manage issue sets” permission.
Additionally, you must be granted the proper permission to create issues using the issue sets created by an administrator.Permission can be granted by going to Administration > Settings > Roles and permissions and checking the box marked “Activate Issue Set” under the “Lychee Schedule Management (Issue Sets)” section.
❏ Creating a New Issue Set
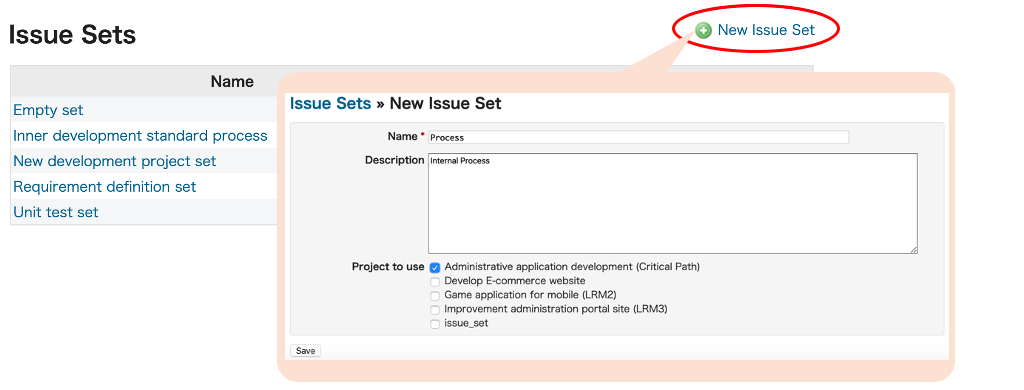
Clicking Administration >  Issue Sets will display the Issue Set management screen.
You can create a new issue set by clicking on “ New Issue Set”.
When creating a new issue set, you can set its name, include an explanation, and specify which projects will use it. You can also specify the projects which will use an issue set when creating or editing the issue set or from a project’s Settings screen.
❏ Editing an Issue Set
Selecting the issue set you want to edit on the Issue Set management screen will display a list of the issues belonging to that set.
Clicking and dragging the green arrows at the right side of the issue list allows you to change the order in which they are displayed (Redmine 3.3 and later versions only).
Also, you can change the name, explanation, and projects which use the issue set by clicking on “ Edit”.
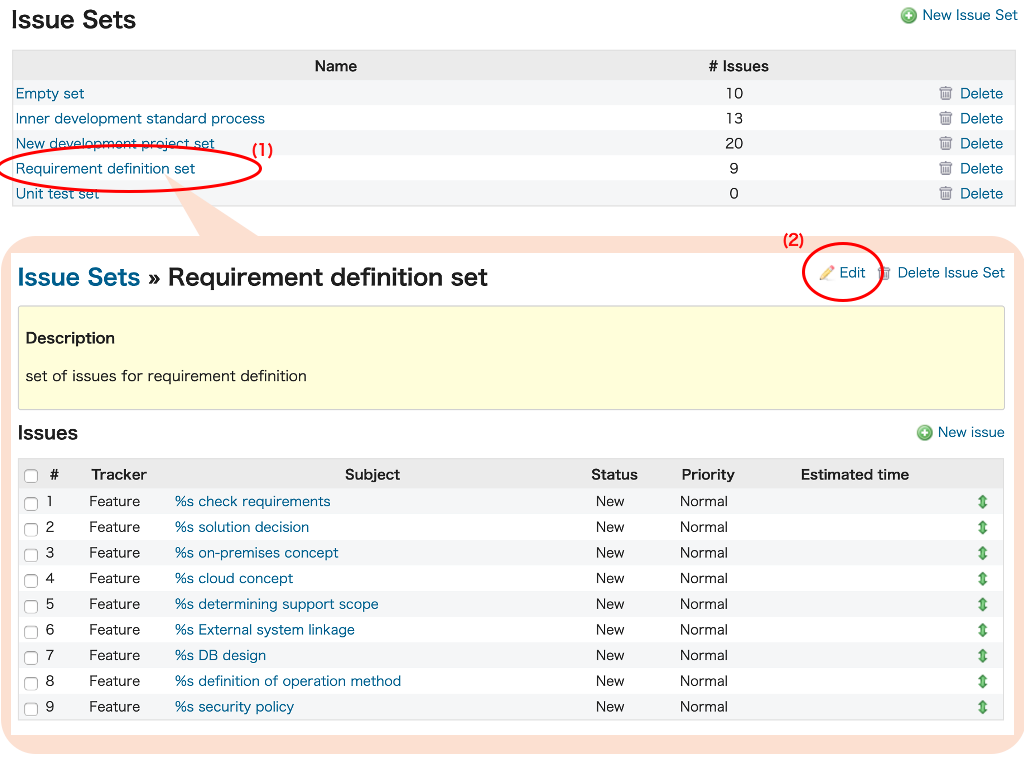
(1): Select an issue set to edit.
(2): clicking on “Edit”.
❏ Creating a New Issue
Selecting any issue set on the Issue Set management screen will display a list of the issues belonging to that set.
Clicking on the “ New Issue” link at the top right of the list will allow you to create a new issue.
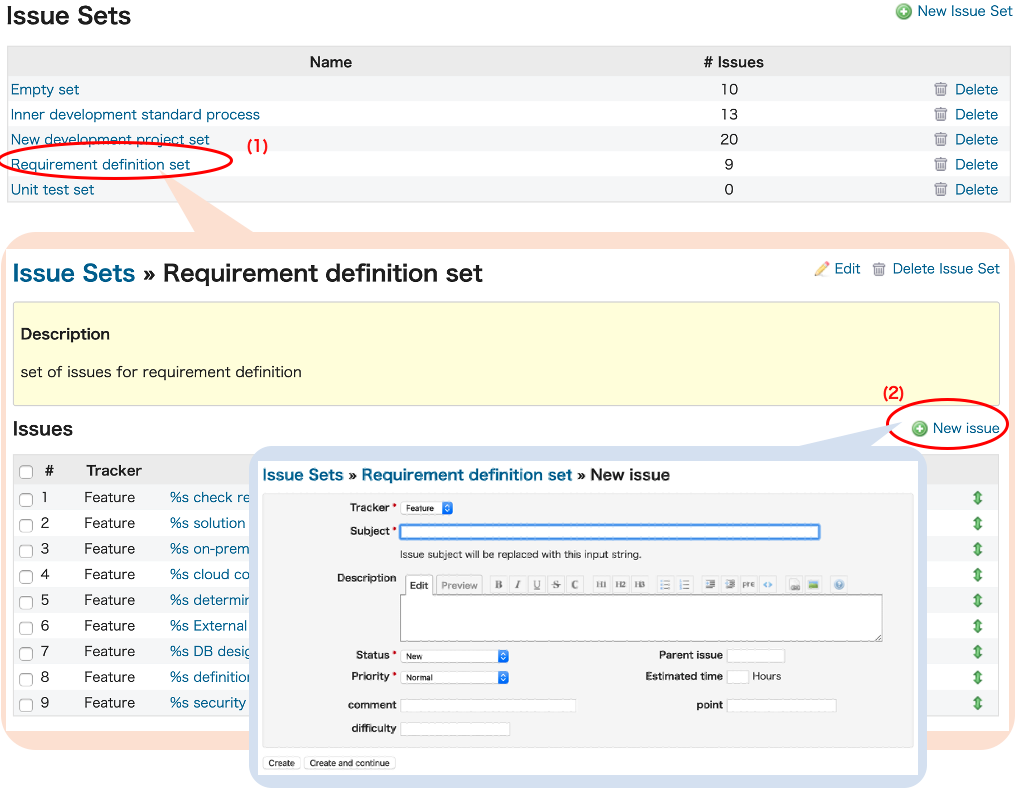 (1): Select an issue set to edit.
(2): clicking on “New Issue”.
❏ Editing an Issue
Selecting the issue set which includes the issue you want to edit on the Issue Set management screen will display a list of the issues belonging to that set.
Selecting the issue you want to edit and clicking “ Edit” in the top right will allow you to edit the issue.
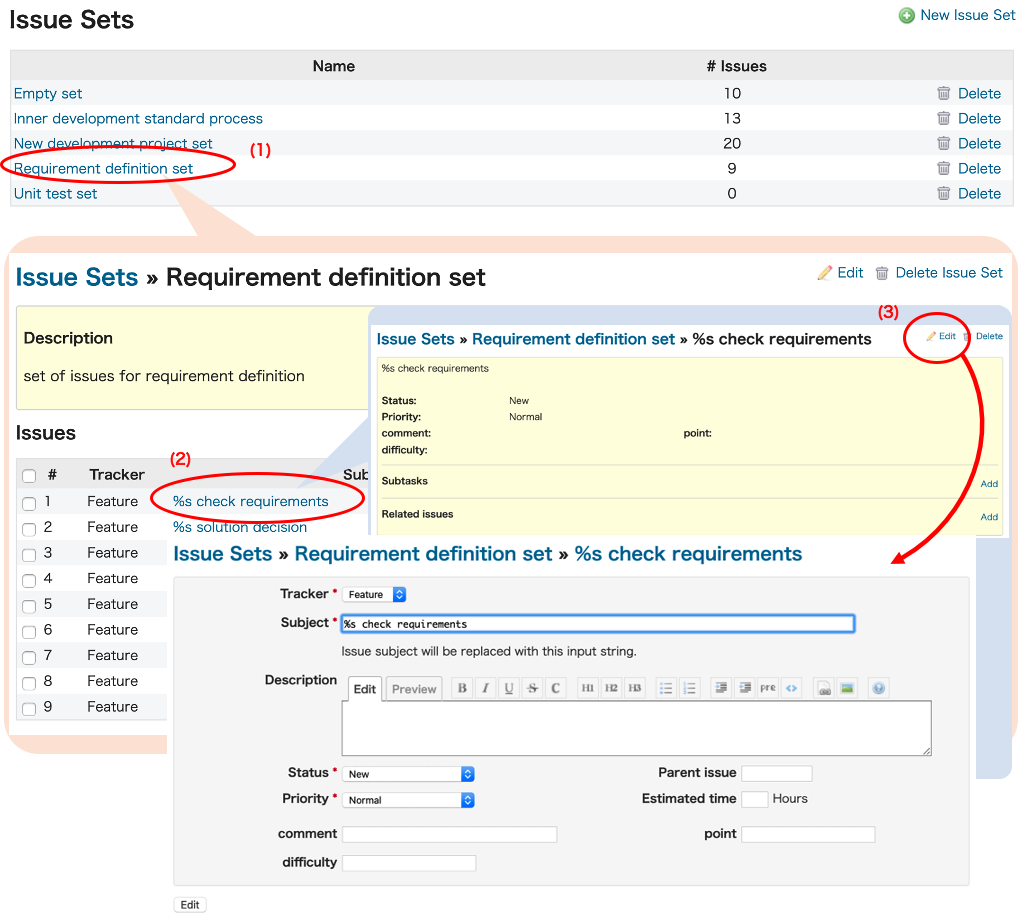 (1): Selecting the issue set which includes the issue you want to edit on the Issue Set.
(2): Select the issue you want to edit from the issue list that belongs to the issue set.
(3): clicking on “Edit”.
❏ Selecting an Issue Set to be Used by a Project
You can select which issue sets are used in a project by going to the project’s Settings > Issue Set.
Additionally, you can select which projects use a given issue set when Creating/Editing an Issue Set.

❏ Creating an Issue from an Issue Set
How to create
To add all the issues included in an issue set to a project, you can add them either from the “Issues” tab (Issue List) on the Project screen or from the “+” tab (Redmine 3.3 and later versions only).
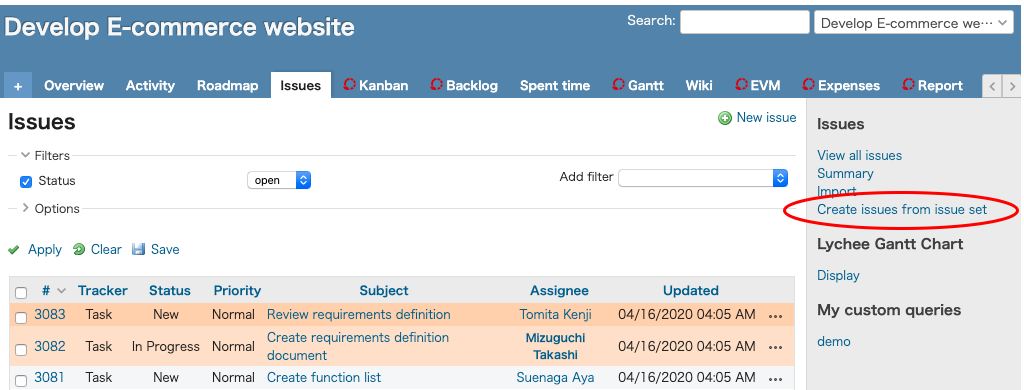
a) Creating from the “Issues” tab (Issue List) on a Project screen
Select “Create issues from issue set” in the submenu on the right-hand side of the “Issues” tab (Issue List) on a Project screen.
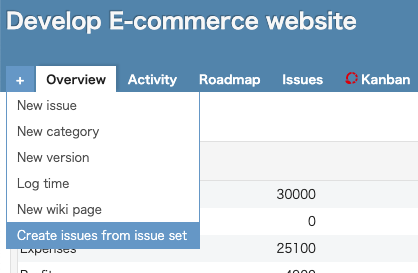
b) Creating from the “+” tab on a Project screen
Select “Create issues from issue set” from the “+” tab on a Project screen (Redmine 3.3 and later versions only).
Selecting an issue set from which to add all issues
You can select the issue set you want to add from the “Issue Set” pulldown menu under the title at the top left of the screen.

Editing the issues to be added
Selecting the issue set will cause an editing screen to be displayed for all issues included in the set.
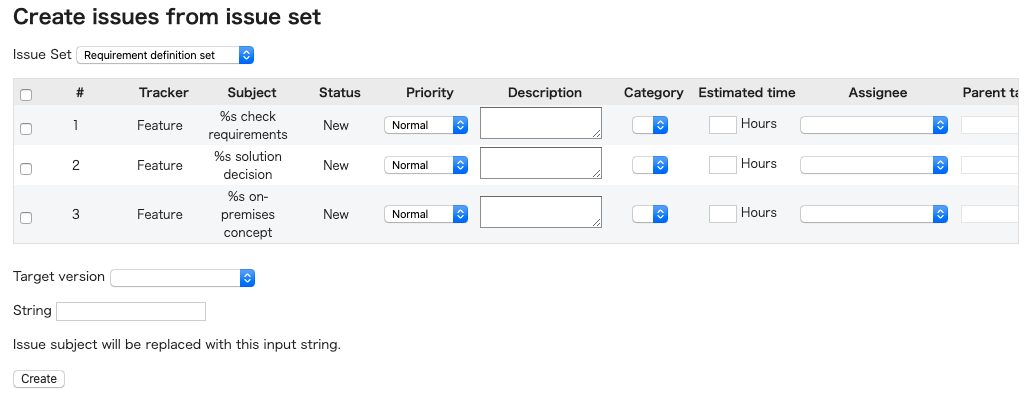
After entering the values in each field, click the “Create” button to create the issues.
❏ Creating a Child Issue from an Issue Set
How to create
To add an issue within a set as the child issue of another issue, select the parent issue on the “Issues” tab (Issue List) on the Project screen. Clicking the issue’s number or title will display the issue’s Details screen.
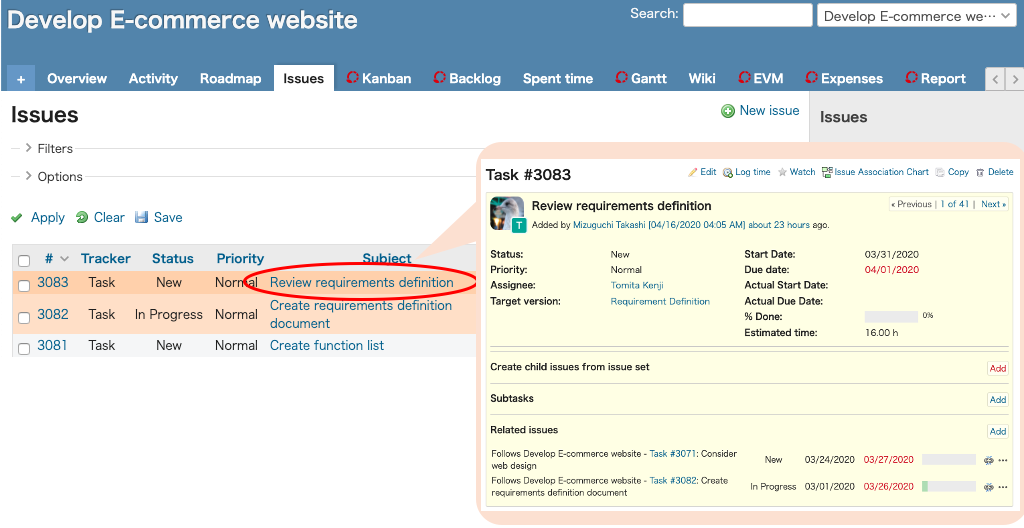
On the issue’s Details screen, clicking the “Add” link to the right of “Subtasks” will display a “Subtasks” screen.
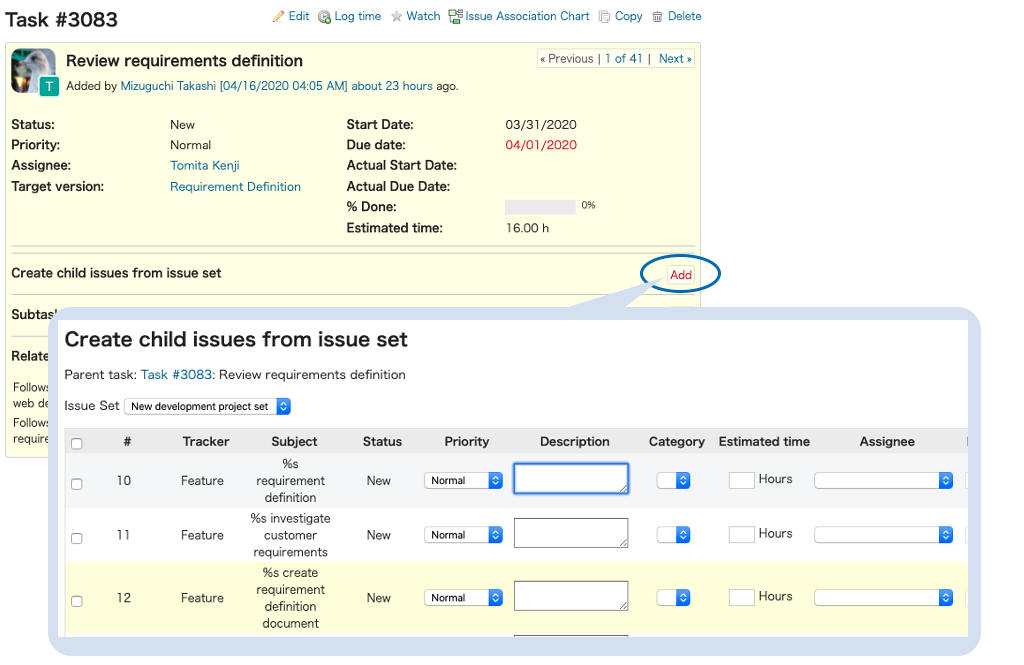
Selecting the issue set to be added as child issues
You can select the issue set you want to add from the “Issue Set” pulldown menu under the title at the top left of the screen.

Editing the issues to be added
Selecting the issue set will cause an editing screen to be displayed for all issues included in the set.
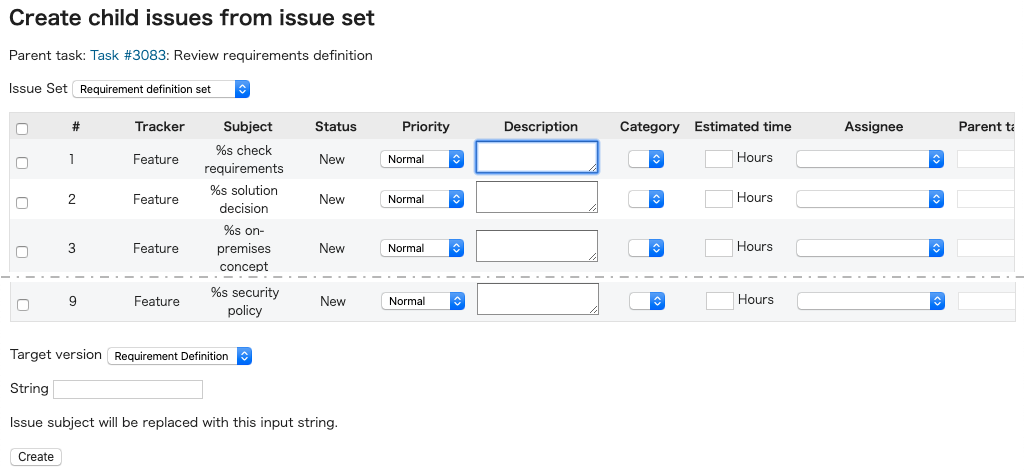
After entering the values in each field, click the “Create” button to create the issues.
コメント